Detox の導入 〜 最初のテストまで
React, JavaScriptDetox の備忘録。
Detox とは
wix が開発している、React Native 上で動く E2E ライブラリ。
グレーボックステスト(実装を把握しつつ行われるブラックボックステスト)をコンセプトとしている。
wix/Detox: Gray box end-to-end testing and automation framework for mobile apps
よく比較対象に挙げられるのが Appium で、そちらは Selenium のモバイルアプリ版。
Detox は WebDriver ではなく、EarlGrey と Espresso で動かせるように実装されている。
この手の E2E は端末操作の自動化みたいなモノになるけど、アプリ内の通信などが生じるのでどうしても冪等でなく、"Flakiness" なテストになりがちなのが問題だった。
アプリの挙動もちゃんと見ながら E2E をやろうず、というのが Detox。
導入
基本的には getting-started の手順通りに進めて、detox build を実行して、ビルドが通れば成功。
導入は楽なものの、各所に罠がある。
特に「10 分程度で終わる」とあるが、ビルドに 30 分以上かかる。
他にも見落としがちな罠を書き残しておく。
共通
Detox は jest だけでなく jest-circus を environment に使っている。
jest-circus はカスタム testEnvironment にイベントを bind できるものだそうな。
jest/packages/jest-circus at master · facebook/jest
jest-circus も入れておく。
shell
npm install -D jest-circus
また、TypeScript に対応させるため、ts-jest と @types/detox を入れて…
shell
npm install -D ts-jest @types/detox
"e2e/config.json" をいじる。
e2e/config.json
{
  "testEnvironment": "./environment",
  "testRunner": "jest-circus/runner",
  "testTimeout": 120000,
  "testRegex": "\\.e2e\\.[j|t]s$",
  "preset": "ts-jest",
  "reporters": ["detox/runners/jest/streamlineReporter"],
  "verbose": true
}
iOS
下記を読んで applesimutils を入れる。
Detox/Introduction.IosDevEnv.md at master · wix/Detox
あとは下記の設定を進める。
Detox/Introduction.Ios.md at master · wix/Detox
罠は ".detoxrc.json" の設定。
サンプルコードは下記のようになっている。
.detoxrc.json
{
  "configurations": {
    "ios.sim.debug": {
      "binaryPath": "ios/build/Build/Products/Debug-iphonesimulator/example.app",
      "build": "xcodebuild -project ios/example.xcodeproj -scheme example -configuration Debug -sdk iphonesimulator -derivedDataPath ios/build",
      "type": "ios.simulator",
      "device": {
        "type": "iPhone 11 Pro"
      }
    }
  }
}
これの example をアプリ名に置き換えるだけ、と思いきや、サンプルコードの下にさりげなく書いてあった。
For React Native 0.60 or above, or any other iOS apps in a workspace (eg: CocoaPods) use -workspace ios/example.xcworkspace instead of -project.
サンプルコードは xcodeproj 指定になっているので、RN 0.60 以上だと "modulemap not found" エラーでビルドに失敗する。ドキュメントは最後まで読みましょう。
下記が workspace 指定のもの。
.detoxrc.json
{
  "configurations": {
    "ios.sim.debug": {
      "binaryPath": "ios/build/Build/Products/Debug-iphonesimulator/example.app",
      "build": "xcodebuild -workspace ios/example.xcworkspace -scheme example -configuration Debug -sdk iphonesimulator -derivedDataPath ios/build",
      "type": "ios.simulator",
      "device": {
        "type": "iPhone 11 Pro"
      }
    }
  },
  "test-runner": "jest"
}
Android
iOS に比べて導入手順が煩雑。エミュレーターが動くところまでやった。
https://github.com/wix/Detox/blob/master/docs/Introduction.AndroidDevEnv.md
その後の設定手順も長い。手順通りにやれば問題なかった。
https://github.com/wix/Detox/blob/master/docs/Introduction.Android.md
罠は "DetoxTest.java" の保存場所だった。
場所が "android/app/src/androidTest/java/com/example/" なので "android/app/src/" に "androidTest" フォルダを作る必要あり。
"androidTest" はハードウェアやエミュレーターで実行されるテスト(インストゥルメント化テスト)の置き場所らしい。
アプリをテストする | Android デベロッパー | Android Developers
間違えて "android/app/src/main" 配下に入れると com.wix.detox.Detox などが呼び出せないのでビルドに失敗する。(それはそう)
テストを書く
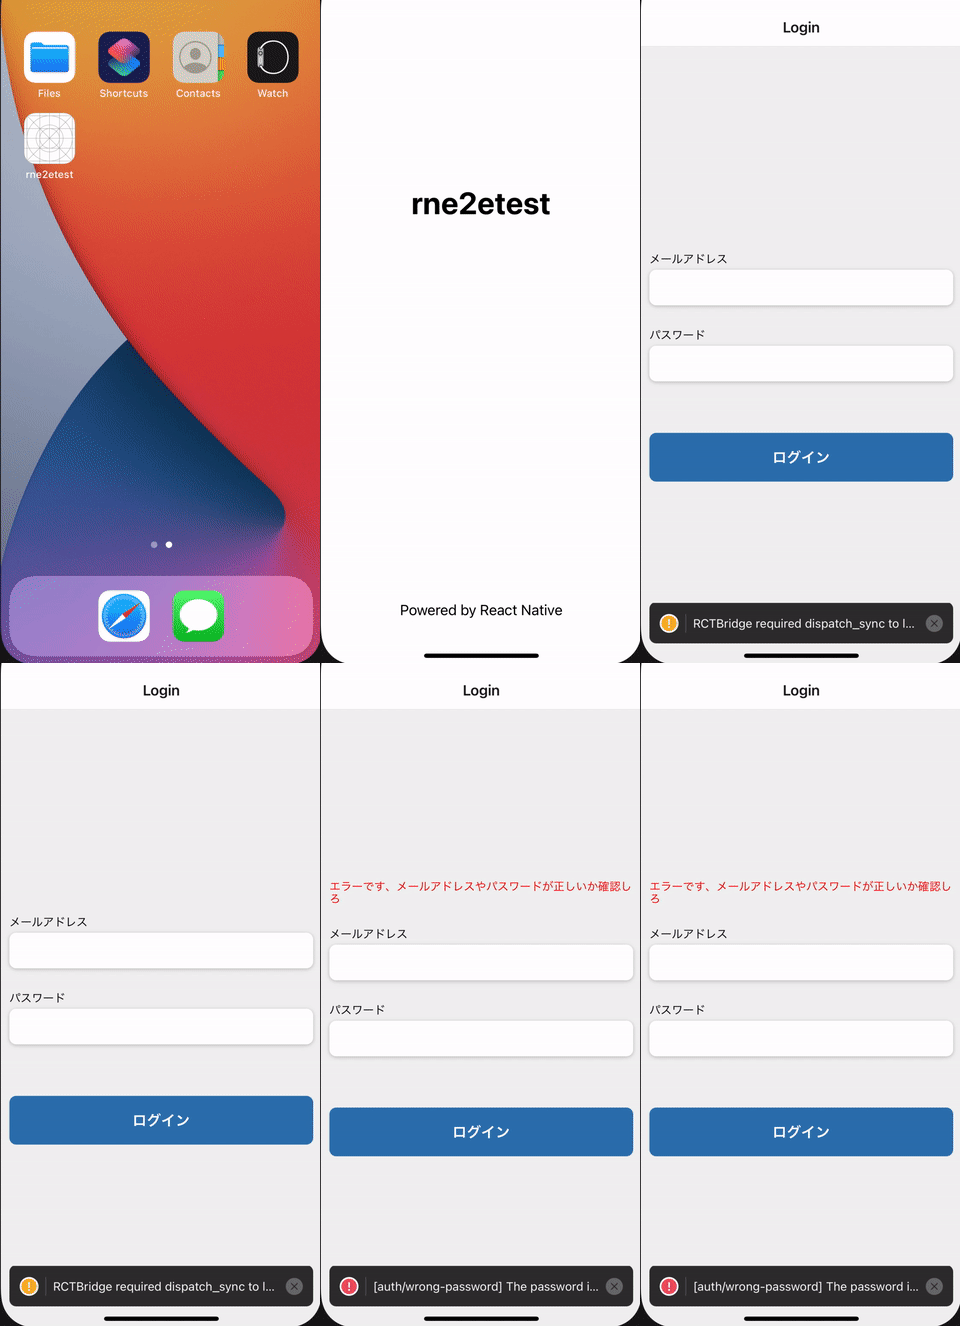
素振りとして Firebase Authentication を使った、メルアド & パスワードでログインする時のテストを書いた。
あらかじめ操作対象には testID を設定しておく。
src/components/Signin.tsx
// 省略
<TouchableOpacity
  testID={'signinSubmitButton'}
  onPress={onPress}
>
  <Text style={style.buttonLabel}>ログイン</Text>
</TouchableOpacity>
ID を設定したら、単純なテストを書いてみる。
e2e/firstTest.e2e.ts
import { by, device, element, expect } from 'detox'
import { TEST_ID } from '../src/constants/labels'

describe('ログイン操作', () => {
  beforeEach(async () => {
    await device.reloadReactNative()
  })
  it('何も入力しないで送信ボタンだけ押すと、エラーメッセージが確認できる', async () => {
    await element(by.id('signinSubmitButton')).tap()
    await expect(element(by.id('signinErrorMessage'))).toBeVisible()
  })
})
これで detox test を実行すれば、対象の環境でシミュレーターを起動し、自動的にテストを行ってくれる。
ユーザーが何も入力しないでログインボタンを押した時、エラーメッセージが表示されるかの確認。
shell
detox test -c ios.sim.debug
シミュレーターが実行され、Detox によるテストが行われる。

テストの内容
まず、device.reloadReactNative() をライフサイクルに挿す。
device.reloadReactNative() はシミュレーター上で cmd + d を押すのと同じリロード操作を行う。
e2e/firstTest.e2e.ts
  beforeEach(async () => {
    await device.reloadReactNative()
  })
次に、ログインボタンを element(by.id('signinSubmitButton')) で調べ、tap() でタップ操作をする。
最後に toBeVisible() で、View の 75% 以上が画面上にあるかを判定する。
今回はエラーメッセージを確認した。
e2e/firstTest.e2e.ts
  it('何も入力しないで送信ボタンだけ押すと、エラーメッセージが確認できる', async () => {
    await element(by.id('signinSubmitButton')).tap()
    await expect(element(by.id('signinErrorMessage'))).toBeVisible()
  })
toBeVisible() は opacity やコントラストなどの視覚的な情報は判定していないので、それらのテストは別の方法でやらなければならないけど、「エラーメッセージがはみ出て見えなくなった」のようなデグレは検知できそう。
他のテストを書く
他にもいくつか書いてみる。
最終的にログインする。
e2e/firstTest.e2e.ts
describe('ログイン操作', () => {
  beforeEach(async () => {
    await device.reloadReactNative()
  })
  it('何も入力しないで送信ボタンを押す', async () => {
    await element(by.id('signinSubmitButton')).tap()
    await expect(element(by.id('signinErrorMessage'))).toBeVisible()
  })
  it('パスワードが違う', async () => {
    await element(by.id('signinInputEmail')).typeText(
      'grgrdkrk@blog.net',
    )
    await element(by.id('signinInputPassword')).typeText('korehachigau')
    await element(by.id('signinSubmitButton')).tap()
    await expect(element(by.id('signinErrorMessage'))).toBeVisible()
  })
  it('ログインする', async () => {
    await element(by.id('signinInputEmail')).typeText(
      'grgrdkrk@blog.net',
    )
    await element(by.id('signinInputPassword')).typeText('koredeyoina')
    await element(by.id('signinSubmitButton')).tap()
    await expect(element(by.id('signinErrorMessage'))).not.toBeVisible()
  })
})
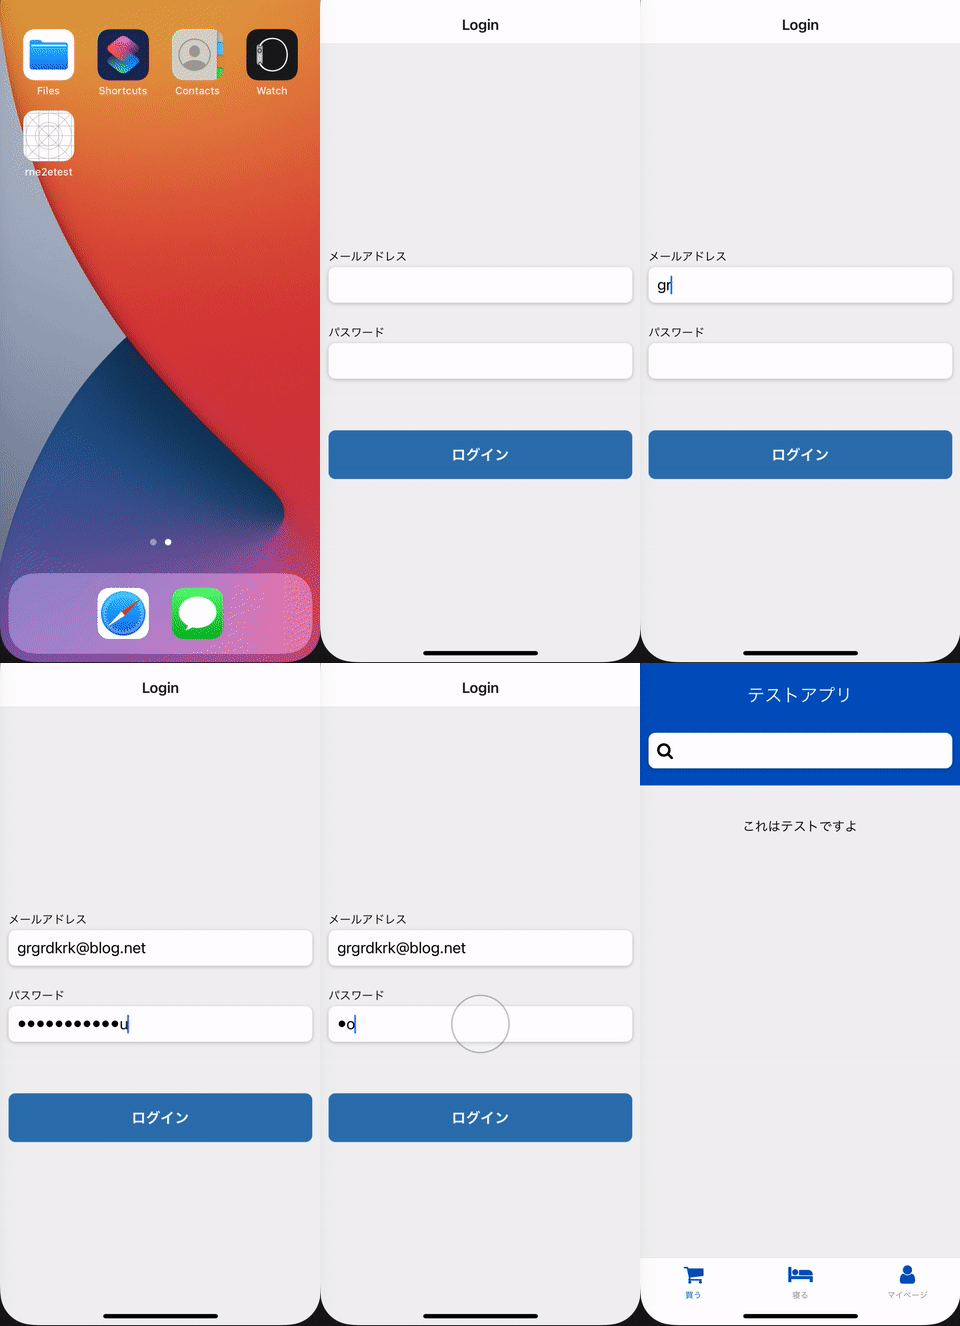
再度 detox test を実行。自動的に操作が行われる。
テストも全て通る。

同期について
ログインの期待値が「エラーメッセージ非表示」では心もとないので、次の画面にある testID があれば OK というテストにする。
Detox は reloadReactNative() などの操作、各種ネットワークの通信状態を見ていて、シミュレーターがアイドル状態になるまで待機してくれる。
ただ、「遷移先の画面が表示される」までの待機処理が怪しかった。
React Navigation でログイン前と後の Stack を変えて、ログイン後の testID を見る、と言うやり方だと、どうも遷移した後の testID が取れたり取れなかったり "Flakiness" なテストになってる。
e2e/firstTest.e2e.ts
describe('ログイン操作', () => {
  beforeEach(async () => {
    await device.reloadReactNative()
  })
  it('ログインする、チュートリアル画面が出る', async () => {
    await element(by.id('signinInputEmail')).typeText(
      'grgrdkrk@blog.net',
    )
    await element(by.id('signinInputPassword')).typeText('koredeyoina')
    await element(by.id('signinSubmitButton')).tap()
    // これが通ったり落ちたりしている。
    await expect(element(by.id('loginDekitazo'))).toBeVisible()
  })
})
何もわからんので waitFor を使い、手動で待機させた。
withTimeout(millis: number) で設定した間、expect が満たされるまでポーリングしてくれる。
e2e/firstTest.e2e.ts
describe('ログイン操作', () => {
  beforeEach(async () => {
    await device.reloadReactNative()
  })
  it('ログインする、チュートリアル画面が出る', async () => {
    await element(by.id('signinInputEmail')).typeText(
      'grgrdkrk@blog.net',
    )
    await element(by.id('signinInputPassword')).typeText('koredeyoina')
    await element(by.id('signinSubmitButton')).tap()
    // 条件を満たすまで待機
    await waitFor(element(by.id('loginDekitazo')))
      .toBeVisible()
      // タイムアウトを指定
      .withTimeout(3000)
  })
})
このように、Detox の同期処理をコントロールしたり、デバッグログを出力できるらしい。
あまり使いたくはないけど、もしもの時に…。
Detox/Troubleshooting.Synchronization.md at master · wix/Detox
終わり
つづきます。